![[Abs-Zero]](http://www.abs-zero.com/wordpress/wp-content/uploads/2013/11/abs-zero.jpg)
February 2019 and after the snow we’ve had some wet weather. I started noticing the windscreen was misting up and the air inside the car always felt slightly damp. The final straw was when I found water sat on the sill trim and door seal as I opened the door, several days in a row.
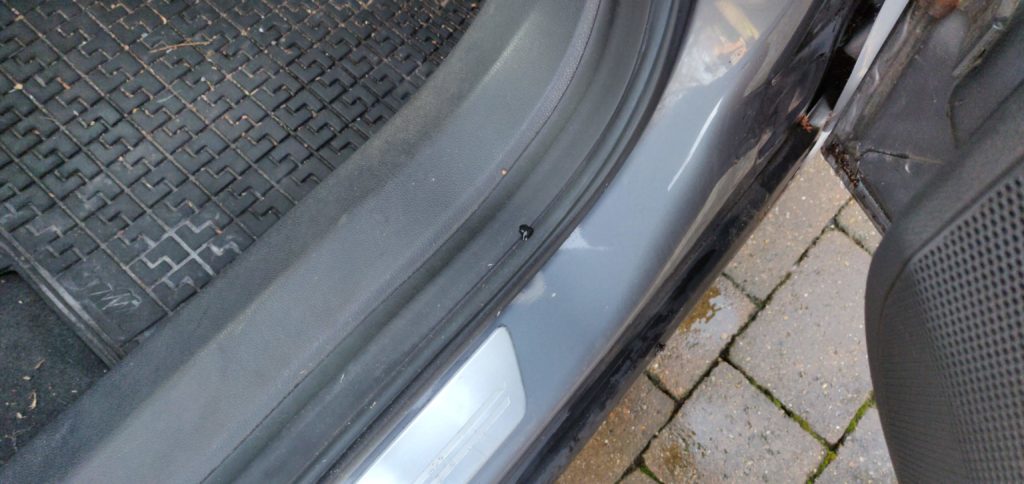
Looking at the underside of the door it is clear that the water is somehow running through from behind the door card, so let’s diagnose and fix it.
You will need:
- A medium flat bladed screwdriver,
- A T25 Torx screwdriver (or Torx key),
- Some waterproof silicone sealant,
- A couple of hours at most.
Firstly, I used a watering can to pour a gentle stream of water over the door seals, with no leaks, then I did the same over the window, as it is inevitable that some passes the rubber weather strip and goes down the glass, draining out through the door. Sure enough, a drop of water was eventually found on the inside of the door seal. Looking at the underside of the door carefully shows this has been wet a few times.
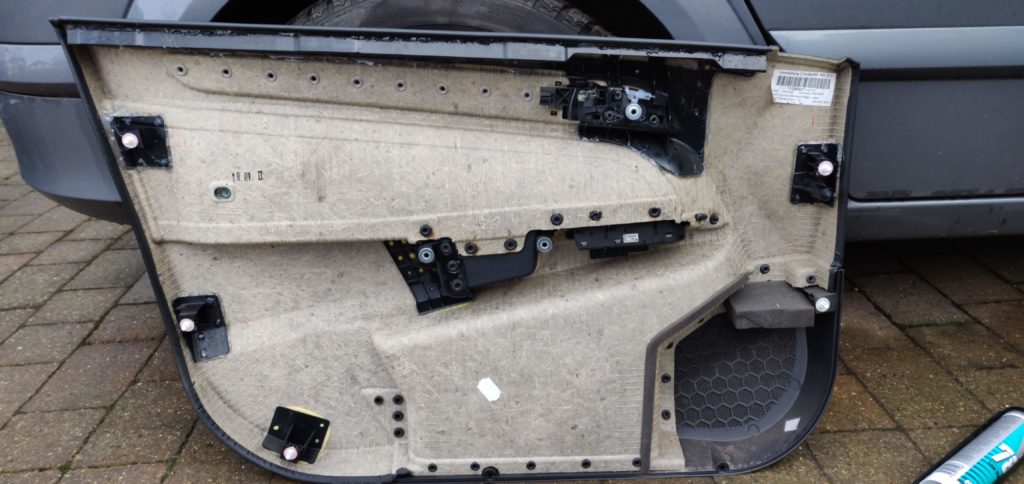
Remove the door card:
- Remove the cover plate behind the interior handle (small flat blade screwdriver) and the T25 Torx screw behind it.
- Remove the door grab handle trim by pressing it upwards – the inside trim part comes off, then remove the 2 deeply recessed T25 Torx screws behind it.
- Remove 4 T25 Torx screws from around the door card (one under the speaker, one under the middle of the door bin and two on the outside (rear) vertical edge.
- Pry off the cover over the inside of the door mirror containing the tweeter and try not to break or lose the three plastic spring-rivets that hold it in.
- Pull the bottom of the door card outwards to release the 5 plastic spring rivets, then holding the door card out an inch or so at the bottom, push it upwards to unclip it from at the top from the window sill.
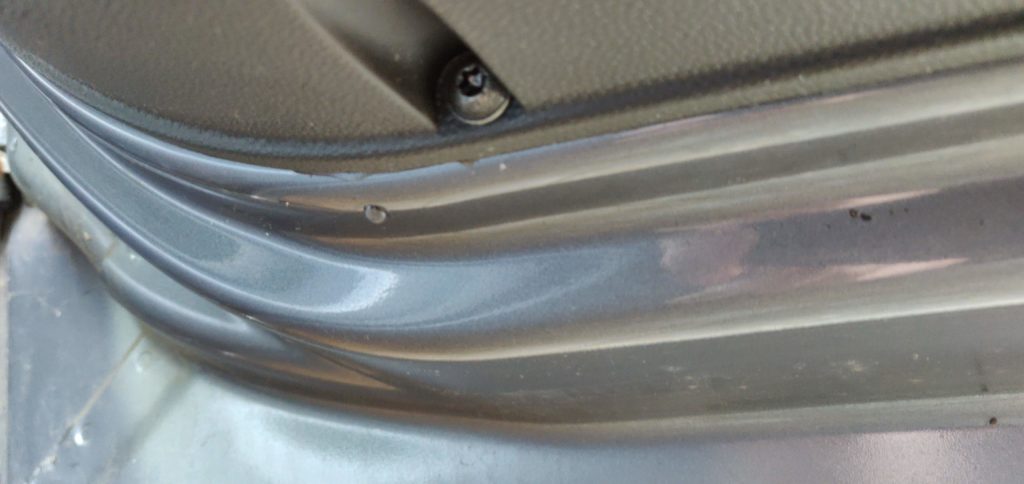
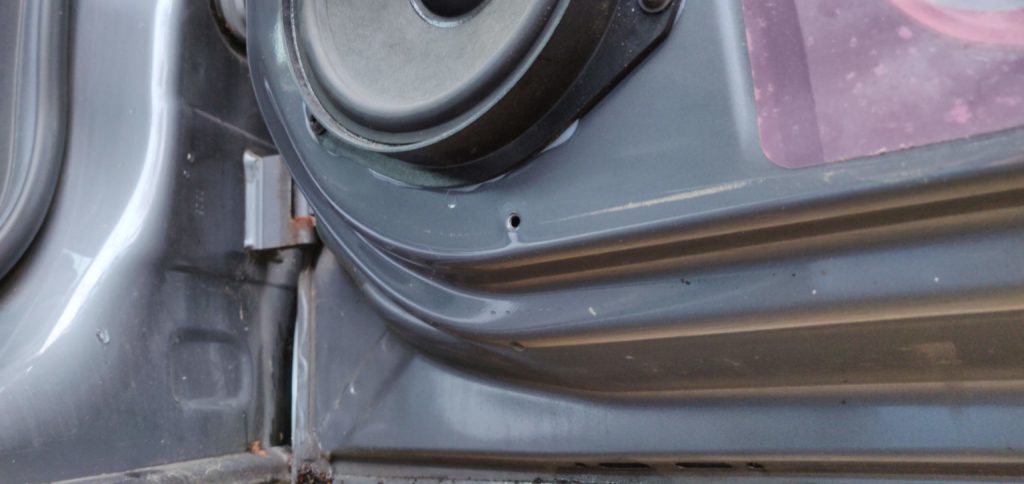
With the door card removed, it is even clearer that this is where the water is coming from.
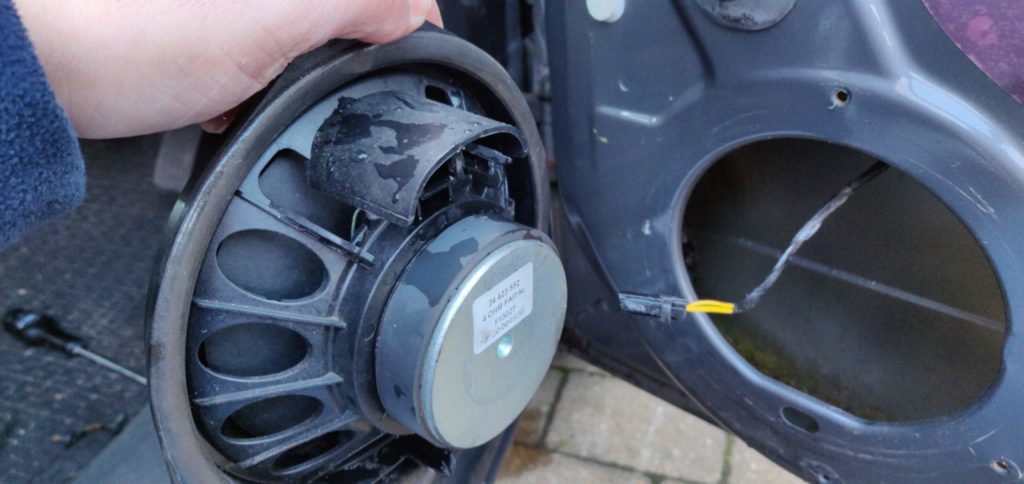
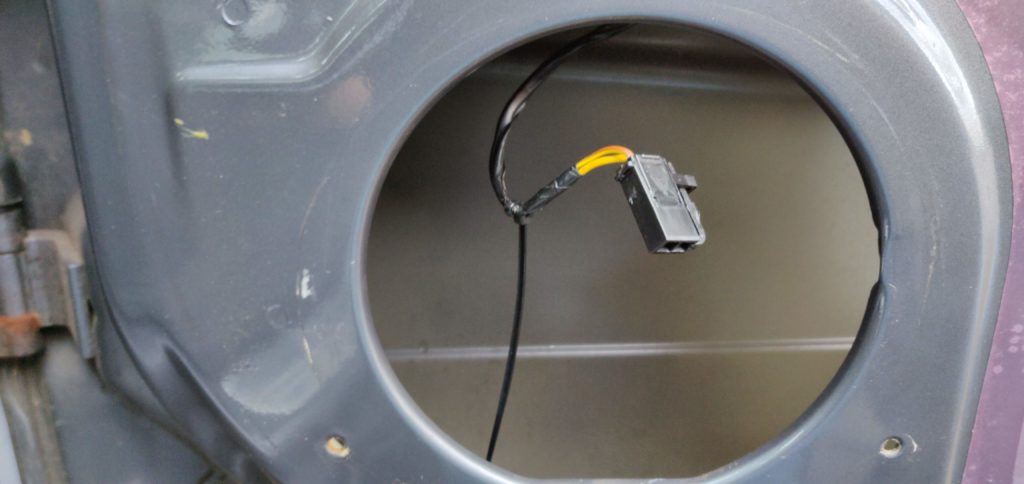
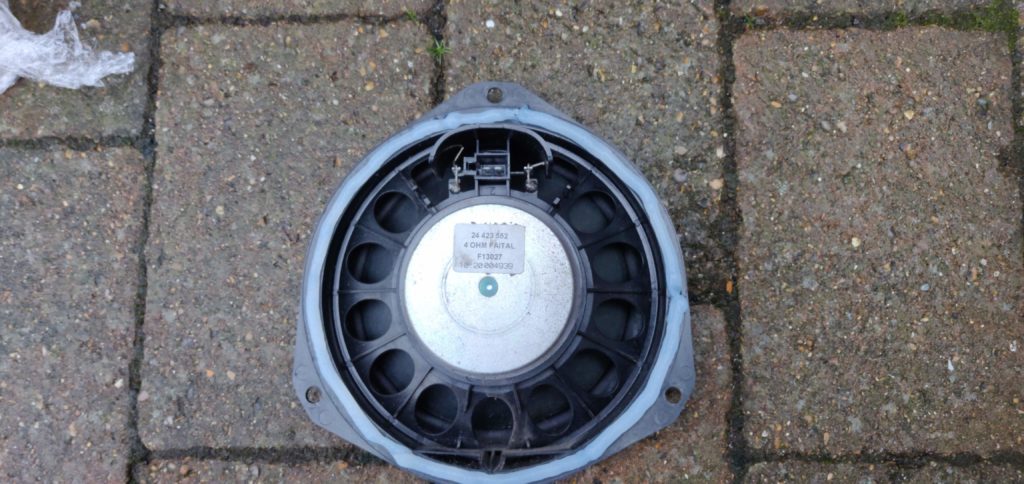
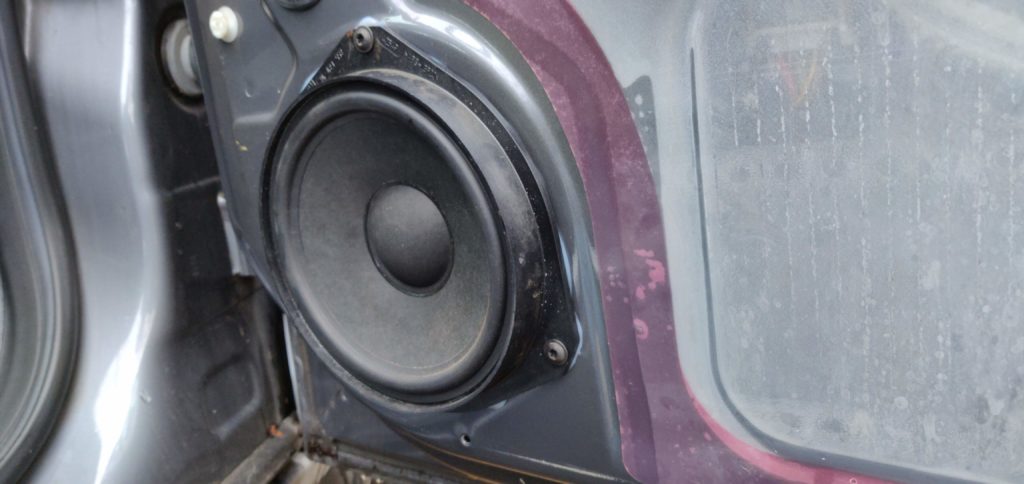
Now remove the loudspeaker (3 T25 Torx bolts) and unplug it’s loom connector – on my car it was wet.
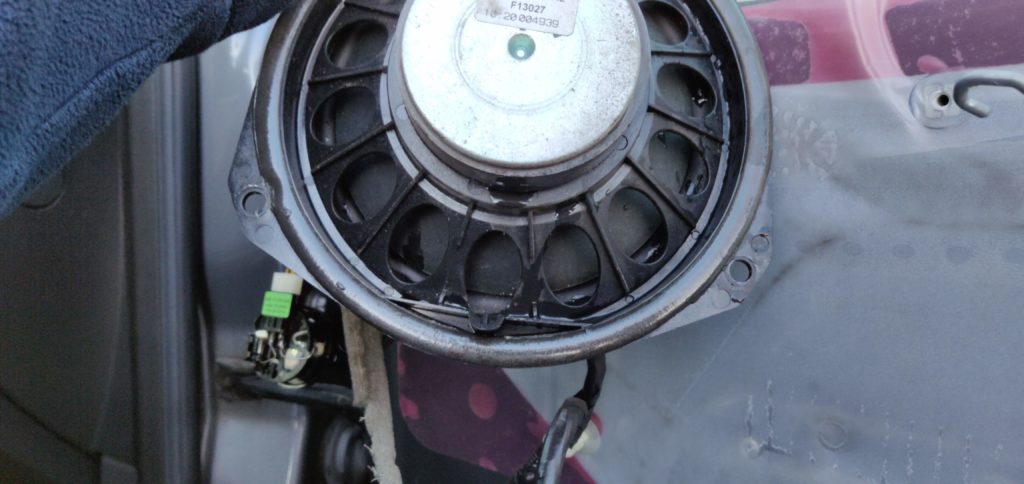
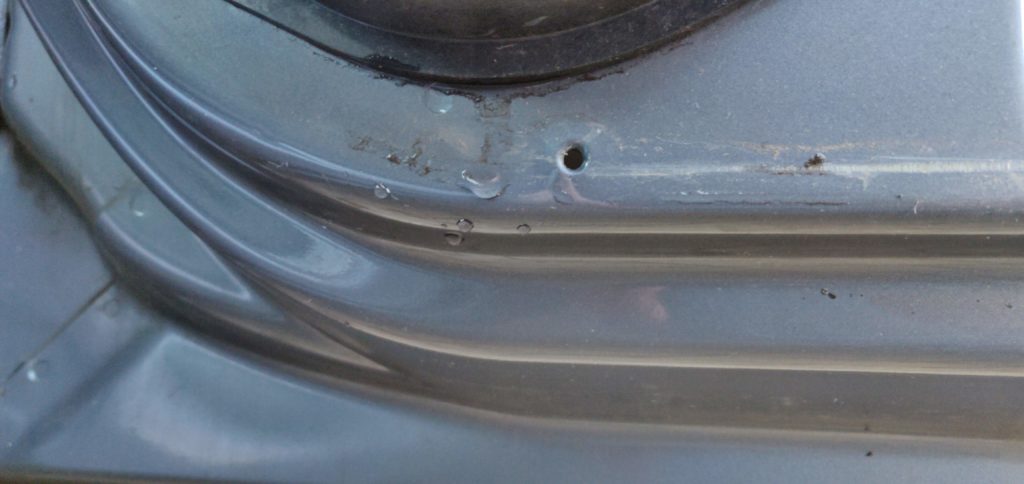
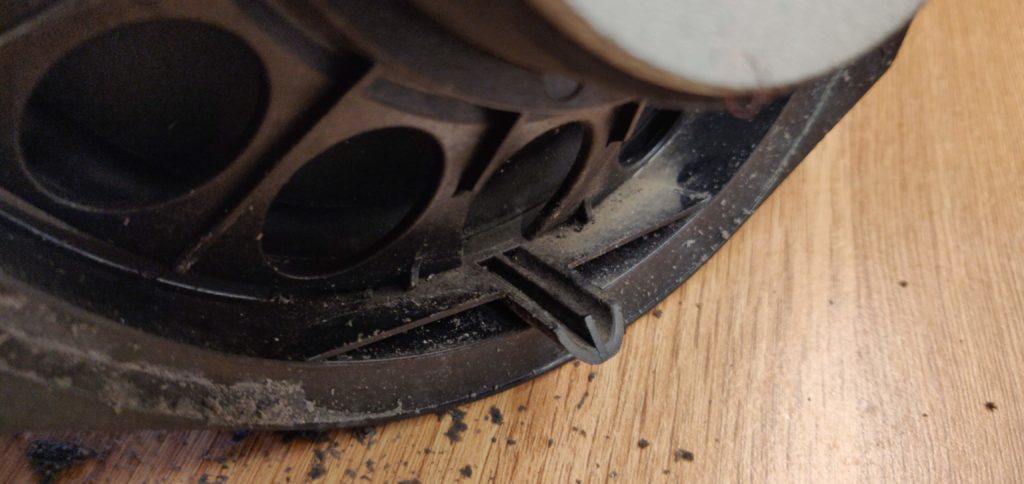
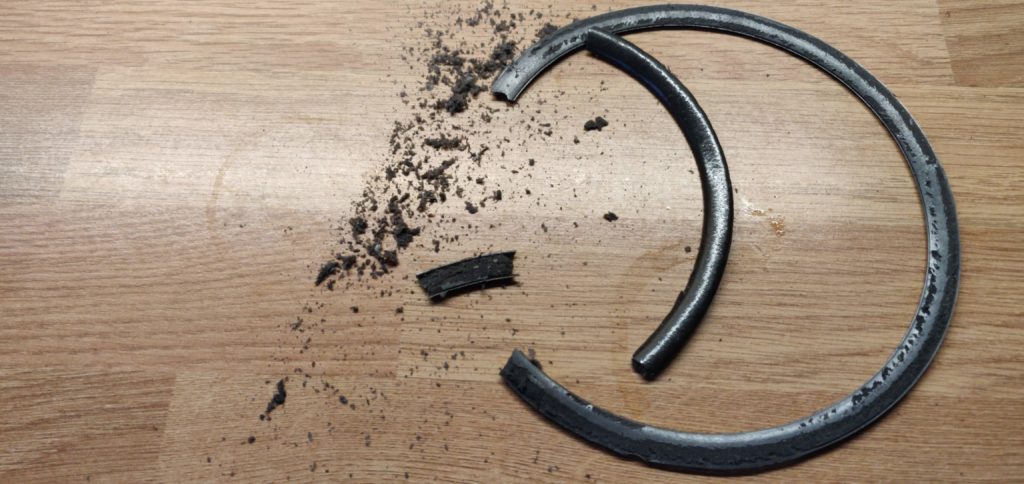
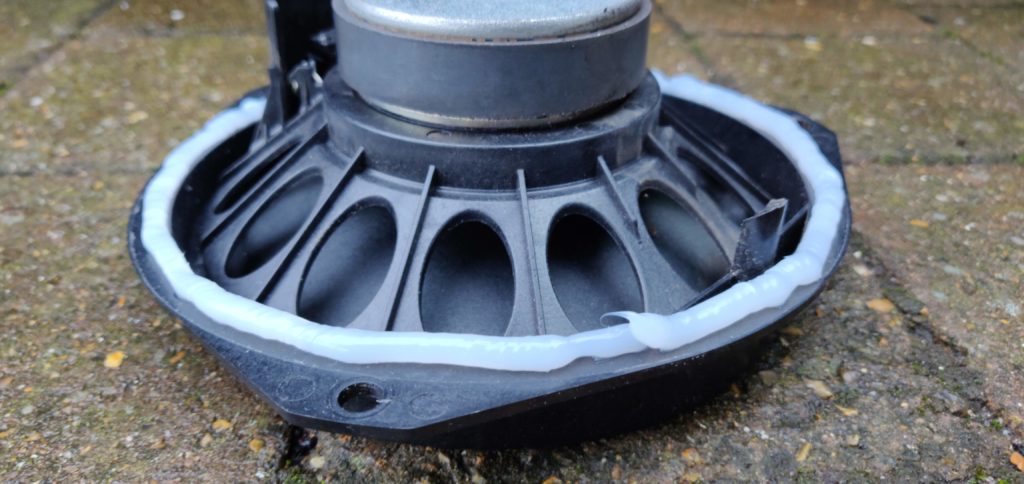
Clean off the foam gasket that is stuck around the speaker mount – it is almost certainly full of water at the bottom and on my car was quite degraded. Use a knife to start and some of it may peel off – rubbing the residue with fingers is all that’s needed to remove all of it. In the second photo below, there is a drain duct that is supposed to take water out of the bottom of the speaker and drain it through a hole in the door panel back into the inside of the door – yes, Vauxhall seem to have accepted that these speakers will routinely get wet.
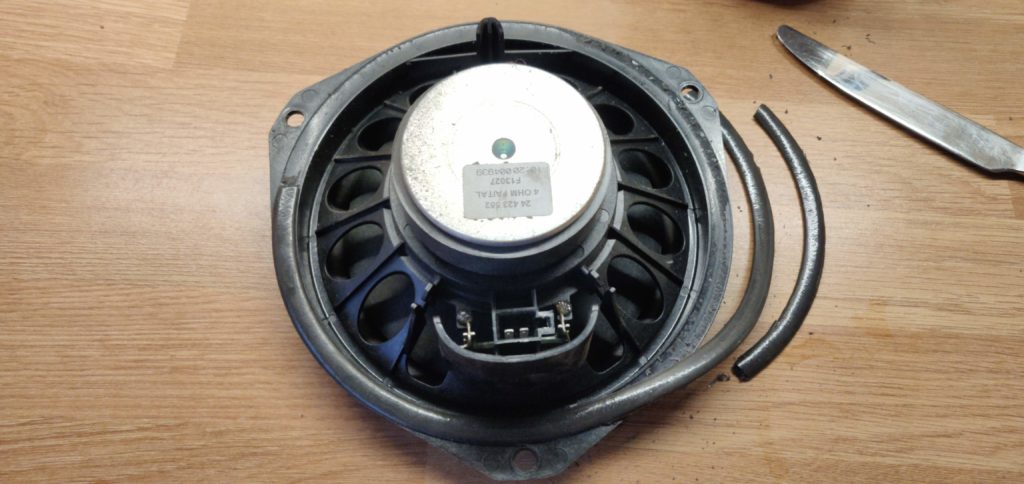
Clean up the inside of the door where the speaker will go back to, then take a cable tie and tie it with the clamp and free end facing downwards about 2cm from the speaker plug. With the plug held horizontally in the same orientation it will plug into the speaker, make a sharp kink in the cable where the cable tie is so that the loom goes down to the kink and then upwards again to the connector. The cable tie is left pointing back into the door to guide drops of water back inside and away from the speaker. A picture says it better:
Now take the speaker and lay a thick bead of silicone sealant around the mounting flange, being pretty generous as the fit with the door isn’t as snug as I’d have expected. Also put blobs of sealant over the mounting holes.
And carefully plug the speaker back in and offer it up to the door. I held it the whole time while I put the first two screws in so that it didn’t move about and spread sealant everywhere. Once in position, tighten the screws – they don’t have to be really tight, just snug. If you’ve put the right amount of sealant on, you should see a little come out around the edges, but not lots.
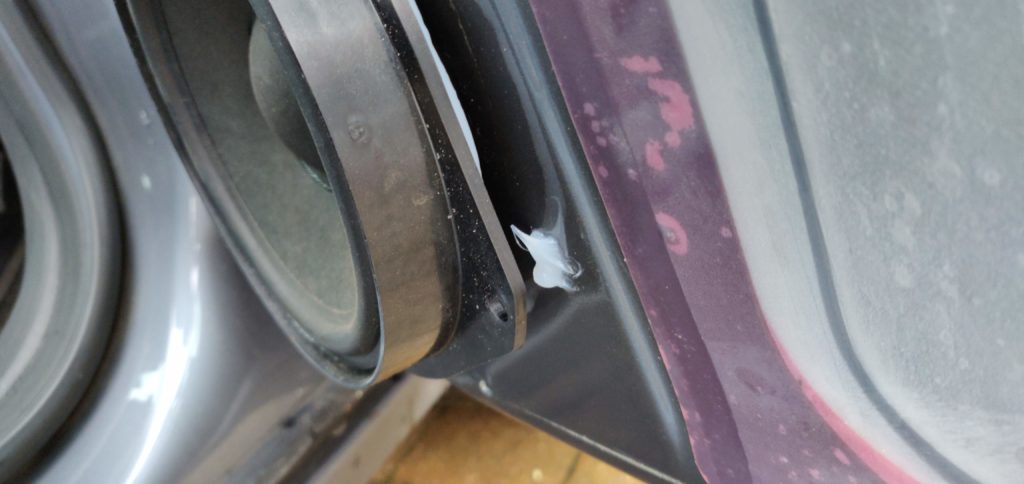
As a precaution, I put a blob of sealant over the door card mounting hole below the speaker – if it does get wet and run around the inside of the speaker, it would be a shame for that to leak.
Inevitably the white rivet clips will have been left in the door so they will need to be retrieved with a suitable tool – I used hose clip pliers, but a broad flat bladed screwdriver also works. Refit them into the reverse of the door card.
Now plug the electric window switch loom back in and the LED backlight from the door handle (if fitted). Refitting the door card is the reverse of removal, starting at the top, hang it over the clips along the window sill so that the plastic rail inside the top edge of the door card passes down into them and press down firmly along the top edge, whilst holding the bottom out an inch or two. Once fully home, press the plastic rivet clips back into their holes starting at the front edge of the door, where there’s a large locating peg to assist.

Refit the 4 T25 Torx screws around the edge of the door card, not forgetting the blob of sealant in the hole under the speaker, the two screws in the door grab handle and one behind the interior door release lever. Press the plastic trim in to cover that last screw and slide the door grab handle cover down into place until it gently clicks.
By this point, in mid-February, I was cold and went in for a hot coffee, but you can go and do a rain dance, enjoy a beer or something.
I hope this was useful. 🙂